Meal Planning: Part I
One of the biggest questions I get from my clients revolves around meal planning and prepping, and so for the next couple of blog posts, I am going to be sharing with you some tips on how to effectively go about this.
Meal planning can make a big difference when it comes to sticking to dietary changes, and for many of you, this may have been a new year’s resolution. It’s easy to rely on convenience foods or resort to take-out when you’re hunger strikes and nothing is defrosted. That is when a little planning can make a big impact. Taking an hour or two a week to plan out healthy meals can create less-hectic mealtimes, save money, and ensure you always have a nourishing meal to replenish after a workout.
Meal planning can feel overwhelming at first, but just like creating goals (discussed here), a plan is much easier if you break it down into steps. There’s no right or wrong way to meal plan, it’s about what works for you. In a world where you are making 35,000 decisions a day, a meal plan can alleviate the guesswork when it comes to feeding yourself and your family. This sounds great in theory, but gets complicated when it comes to putting it into practice. Let’s start with the essentials and a few simple steps to ease into meal planning and prepping like a pro.
Know Your ‘Why’:
Before jumping in head first, you want to think about your ‘why’. What are you looking to gain out of meal planning? This will decide the type of recipes you choose and the motivation to stay consistent. If you’re looking for more variety, then you’ll want to expand outside of your recipe repertoire and cook with new types of food. If you’re looking for peace of mind then simplicity is key. So ask yourself, are you looking for variety, stability, sanity? Maybe you want to save money, eat healthier, or prevent food waste. You don’t have to pick just one, but if you are a beginner meal planner, I would focus on one. If you are a pro, pick 2-3 that feel most important to you. Whichever your reasoning, keep this in mind when you are choosing your recipes and ingredients.
Take Inventory:
Before heading to the grocery store, step into your kitchen and take stock of everything you already have in your fridge, freezer, and pantry. If you are someone who tends to stock up on certain foods when they are on sale- take note of that. Check for any leftovers, frozen meals and ingredients that will go bad. If there is enough food to last you a few days to a week, you can use them in this week’s meal plan. A good rule of thumb is to use what will go bad first.
If you’re feeling uninspired on how to take your remaining ingredients and make a balanced meal, you can input the ingredients you already have into websites like MyFridgeFood, Supercook and FoodCombo. These sites give you recipes based on the ingredients you input. Basically, they do some of the hard work for you!
Pick Your Recipes:
When it comes to choosing recipes, it’s not about just picking a bunch of them and hoping for the best. There should be some sort of strategy involved. Look at your week ahead and decide the number of days and meals you are going to need. For example, if you’re planning to eat 3 meals/day for four days a week then you will need at least 12 meals, not including snacks. You can create a template of the typical breakfast, lunch and dinner meals you enjoy and use that as a foundation to pick recipes and plan when they will be prepared/cooked. If you aren’t sure what you enjoy, this is where you will want to take some time and effort to come up with meals that you have made or had before that you enjoy. Here’s an example:
Breakfast: omelette, oatmeal, smoothie.
Lunch: Salad, Dinner leftovers, slow cooker meal.
Dinner: Stir-fry, seafood meal, casserole, grain bowl.
Now you can start to search for different recipes for these types of meals online or in cookbooks. This might take more time at first, and once it becomes part of your routine, you will be more efficient. Try to pick recipes that have common ingredients so you can ensure the ingredients you buy get used more than once. For example, if you want to make a stir-fry with mushrooms and kale, then also choose an omelette, salad or pasta recipe that also incorporates mushrooms and kale. And remember, if you know how to cook an omelette- there is no need for a recipe!
There is always a learning curve when it comes to trying new recipes, to avoid frustrations or overwhelm, you can rely on recipes or dishes you already know for the bulk of the week and then add in 1 - 2 new recipes per week. That will keep your palate and recipe repertoire expanding while maintaining your sanity. It’s important to choose meals that you like, but don’t be afraid to try new recipes. Your tastebuds might be pleasantly surprised.
Tip: if you are feeling hesitant to try a whole new recipe, but still want to venture out. You can add a new ingredient to a recipe you are already familiar with, such as adding spinach to a beloved lasagna dish. You can also find a variation of a recipe you already like such as trying fish tacos if you already love tacos.
Make A Plan:
Now it’s time to plan. Set aside time to write out a menu for the days you will be cooking so you can get an accurate idea of how much food you will need to buy. As you plan, keep the following things in mind:
Busy days when recipes will need to be simple and quick.
Storage life of fruit, vegetables and meat. (refer to this handout).
Meal you may be eating alone.
Here’s a mock menu plan, I only included the main meal times to keep things simple, but feel free to also plan out your snacks as well. Mondays tend to be exhausting, so keeping it simple with fairly hands-off meals might be helpful. Alternating between sweet and savory breakfasts to break up any monotony and take advantage of leftovers for lunch the next day. Friday is left blank because this is just a broad 4-day plan. If you look at the meals, you will see many of them use similar ingredients or incorporate leftovers from the evening before. It’s a great strategy to make sure no food is left behind! I chose a few different recipes in the mock menu, however, if you are just starting out, you can pick one meal to make for the week.
Breakfast Lunch Dinner
Mon Pineapple Greens Smoothie Sunday night leftovers Crockpot Beef
Fajitas
Tues Veggie Omelette Fajita meat, brown rice Salmon w/
roasted veggies
Wed Pineapple Coconut Oatmeal Grain bowl + salmon Roasted
chicken + veg
Thurs Pineapple Greens Smoothie Chicken sandwich Green salad +
eggs
Make A Grocery List:
Okay you have your week planned out. Now review your chosen recipes and write down all the ingredients you will need. Cross-off any of the ingredients you already have and then group the ingredients by grocery department. For example, group all the produce together, the dairy, and meats. This helps streamline your shopping and prevents you from having to run back and forth in the store. (Tip: you can ask your butcher to chop up your meat or separate your chicken to eliminate one messy step for yourself.)
Ensuring you buy enough food to last for each meal can be a bit tricky and takes some trial and error. If you have a recipe that includes serving sizes, it will make it easier to calculate how much ingredient you will need. If you are not following a recipe then you can guarantee how much protein servings. Using the mock meal plan for reference, for one person you would need at least 2 servings each of beef, eggs, salmon, and chicken. Refer to the chart below to know how many servings you typically get in a package of protein sources at the store. When counting the amount of servings you will need, you should round up as you multiply - You can always freeze raw or cooked meat for another time.
Protein Type Average Serving Size Per Package
Chicken breast 4 - 6 oz Depending on size, can be cut into 2
servings per breast.
Ground Beef ¼ lb 4 servings in 1 lb package.
Fish 3 - 6 oz Depending on size, can be cut into
2 servings per filet.
Eggs 2 6 servings per dozen.
Tofu 3 - 6 oz 2-4 servings per package.
Beans ¼ cup dry | ½ cup cooked Depending on bag size.
Even though snacks are not included in the mock meal plan, don’t forget to plan ready-to-eat snacks. As an athlete, you need ample energy to keep up with your expenditure, but sometimes you don’t have the time to cook or sit-down for a full meal. Having grab-and-go ready on hand can save you from an energy crash and keep you on track with your goals. Items to keep on hand that are nourishing and require limited or no assembly:
Nuts, nut butters
Whole grain crackers and bread
Grab-and-go Fruit - Like apples, oranges, bananas, grapes.
High quality protein bars
Cups of cottage cheese
Yogurt
Hummus
Baby carrots
Plan For The Week:
Once you get home from the grocery store, look again at your menu to decide if there are items you can prep. Prepping ingredients is a time investment but can be a time-saver during the week when you need to whip up a meal on the run. You can pre-chop vegetables, cook a big batch of brown rice, bake chicken that can be chopped up and thrown onto salads, tacos, etc. When it comes to vegetables, some vegetables last longer than others, harder vegetables, such as carrots, broccoli, and cauliflower florets, typically last through the week, while softer vegetables like tomatoes and cucumbers, usually max out at three days. Once they are prepped, store them in airtight containers in the refrigerator (I provide some of my favorites below). Avoid prepping leafy greens; these you will want to wash right before use because the extra moisture from pre-washing will cause them to wilt.
Next, decide how to store your perishable items such as meat. Referring again to the mock menu, beef and salmon will be used in the beginning of the week, so you can keep it ready-to-use in the refrigerator. However, you might want to consider freezing the chicken to ensure freshness later in the week.
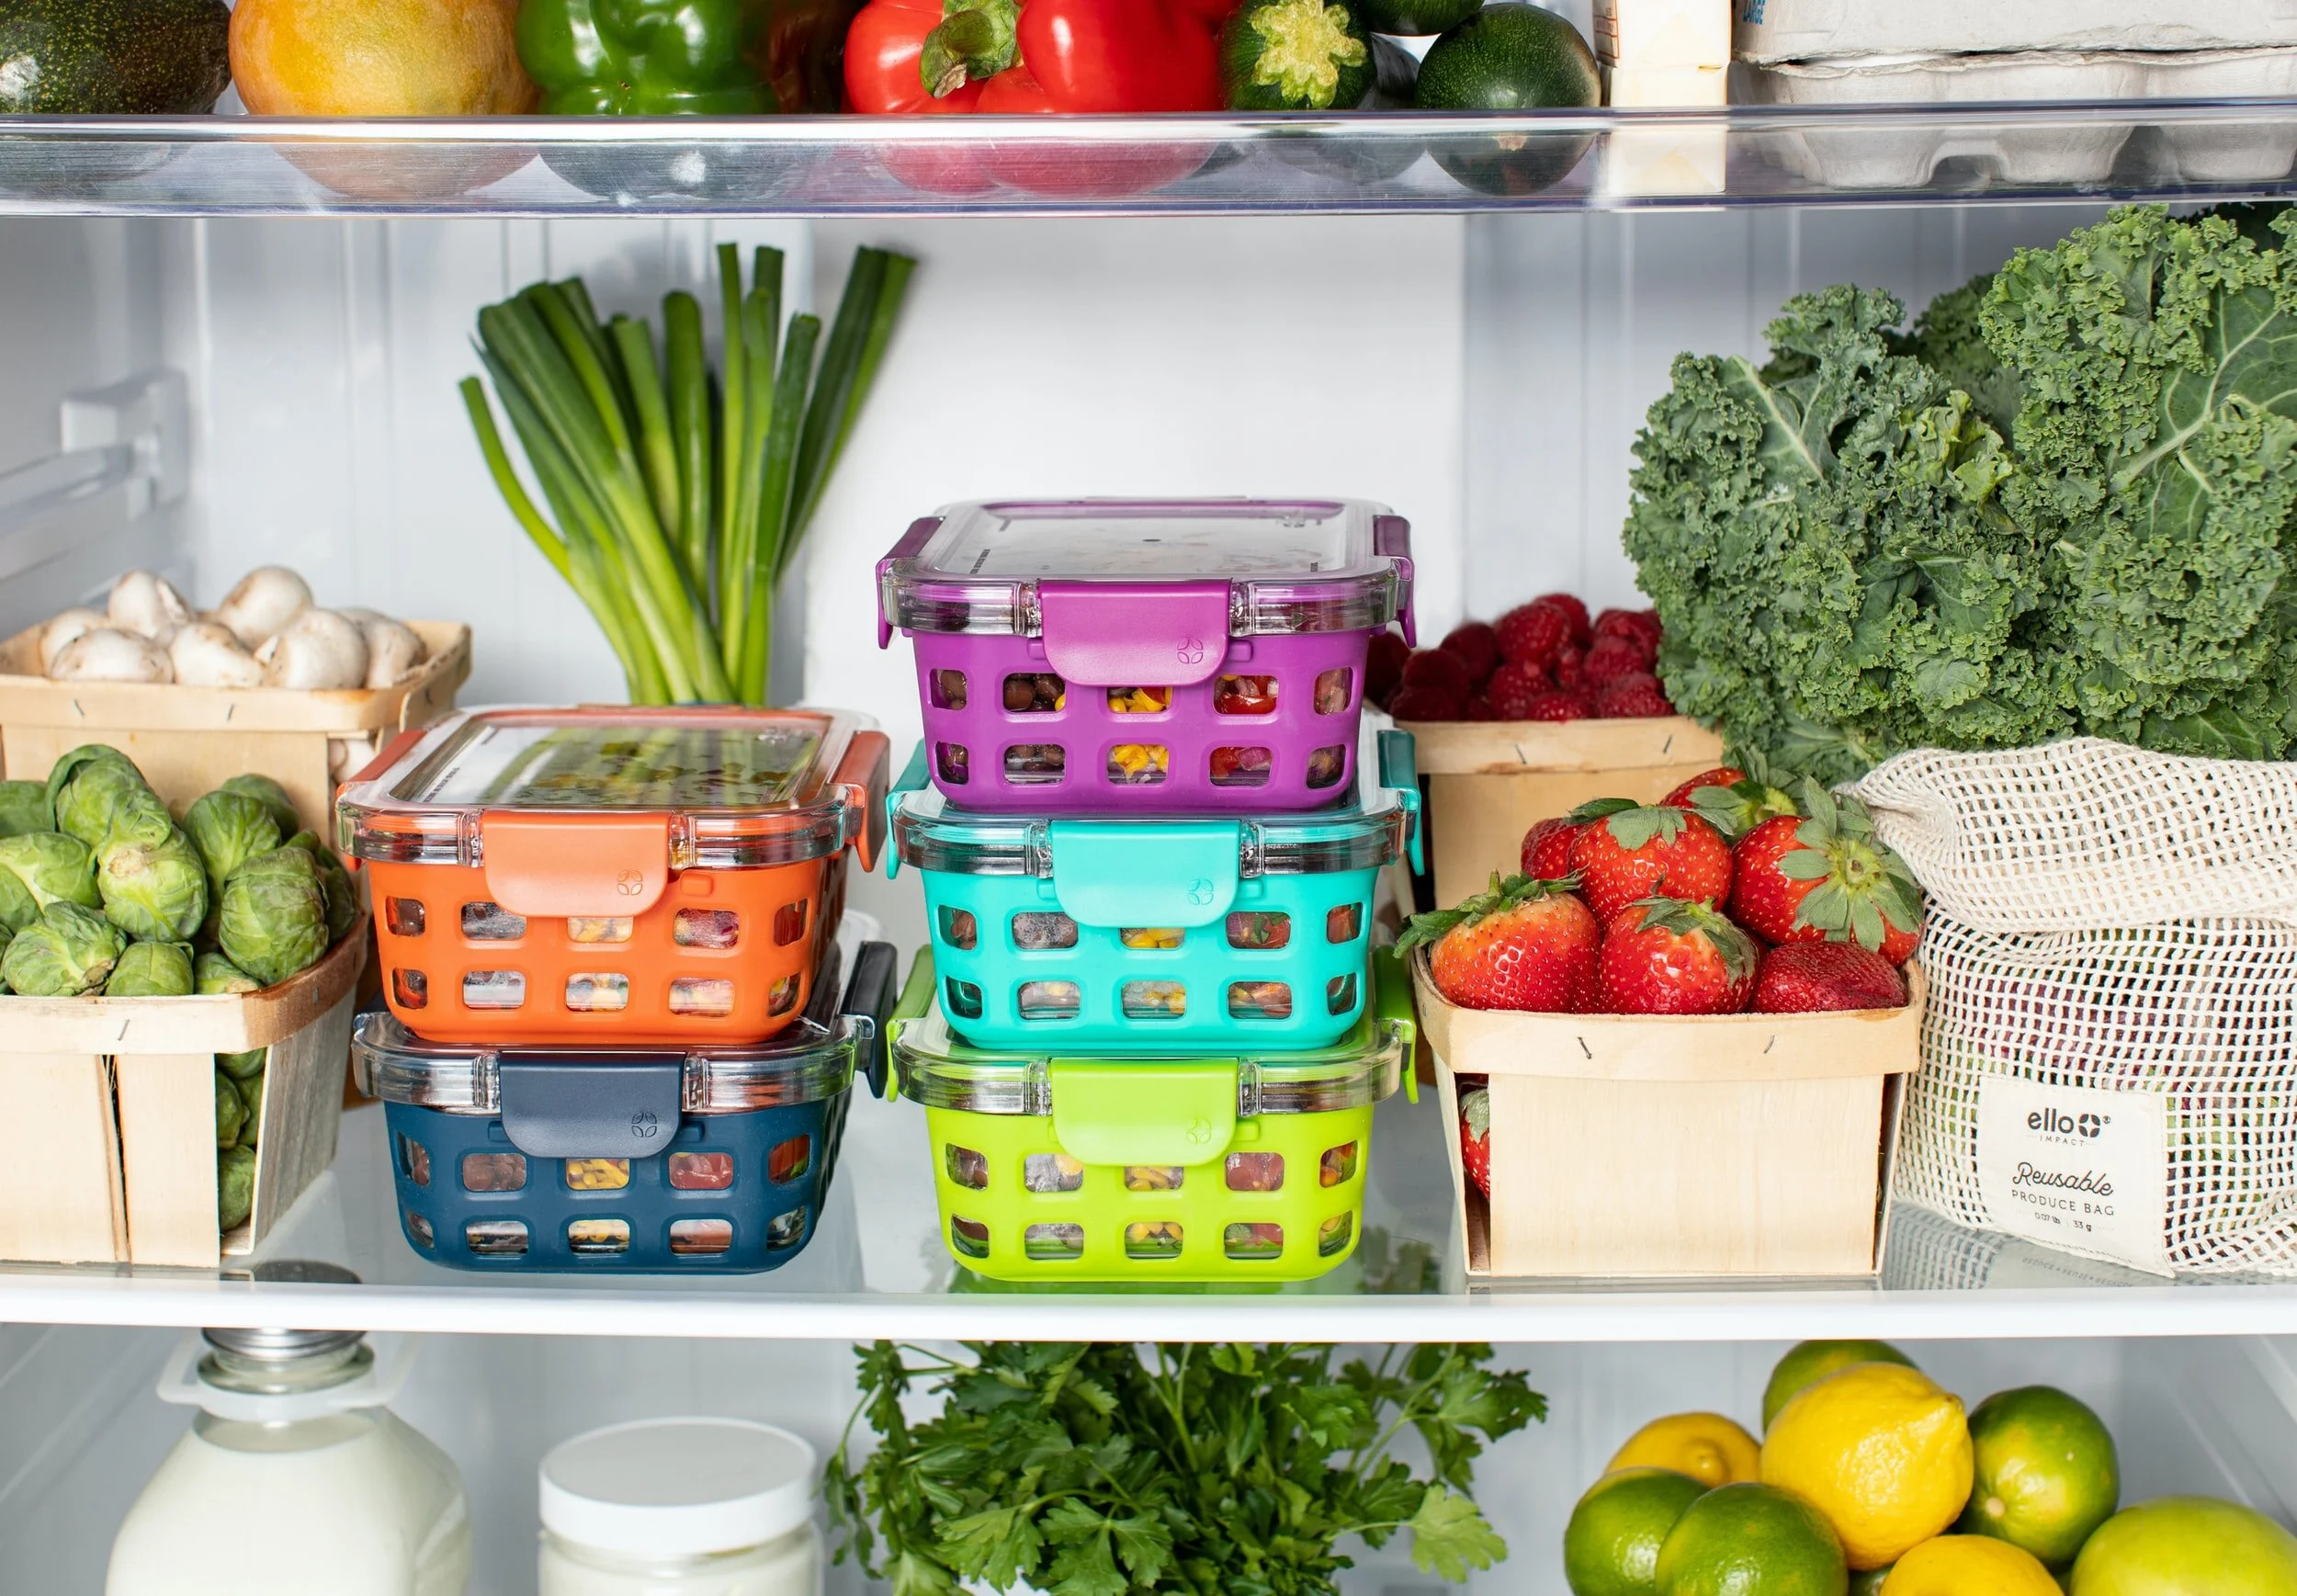
Proper containers:
If you plan on cooking large portions or storing leftovers, you’re going to need the proper equipment so you don’t end up ziplocking everything or just putting cling wrap over bowls. Those are great temporary solutions, but quality containers will help keep your food fresh, prevent spillage and make it easier to travel with. Look for containers that are clear so you can easily see what’s inside and won’t forget what you have and consider buying a proper lunch box so you can take lunch with you to work. I love these glass containers for lunches and these for a wide variety of sizes.
Think of meal planning and prepping as a journey to understanding different ways to nourish your family and yourself. There will be trial and error as you find your own style and method. Do what works for you and frequently reflect on your ‘why’ to make sure you are still aligned with your original goals of starting. Let me know if you implement any of these tools, what worked, what didn’t and if you have any meal planning tools you live-by.